The CreatorCommerce SSO button allows creators to:
- Sign in to their personalized storefront dashboard with one click
- Customize their co-branded shopping experience
- Manage their creator storefront settings
The button automatically authenticates creators using their Superfiliate email, providing seamless access to their CreatorCommerce dashboard.
Setup Steps
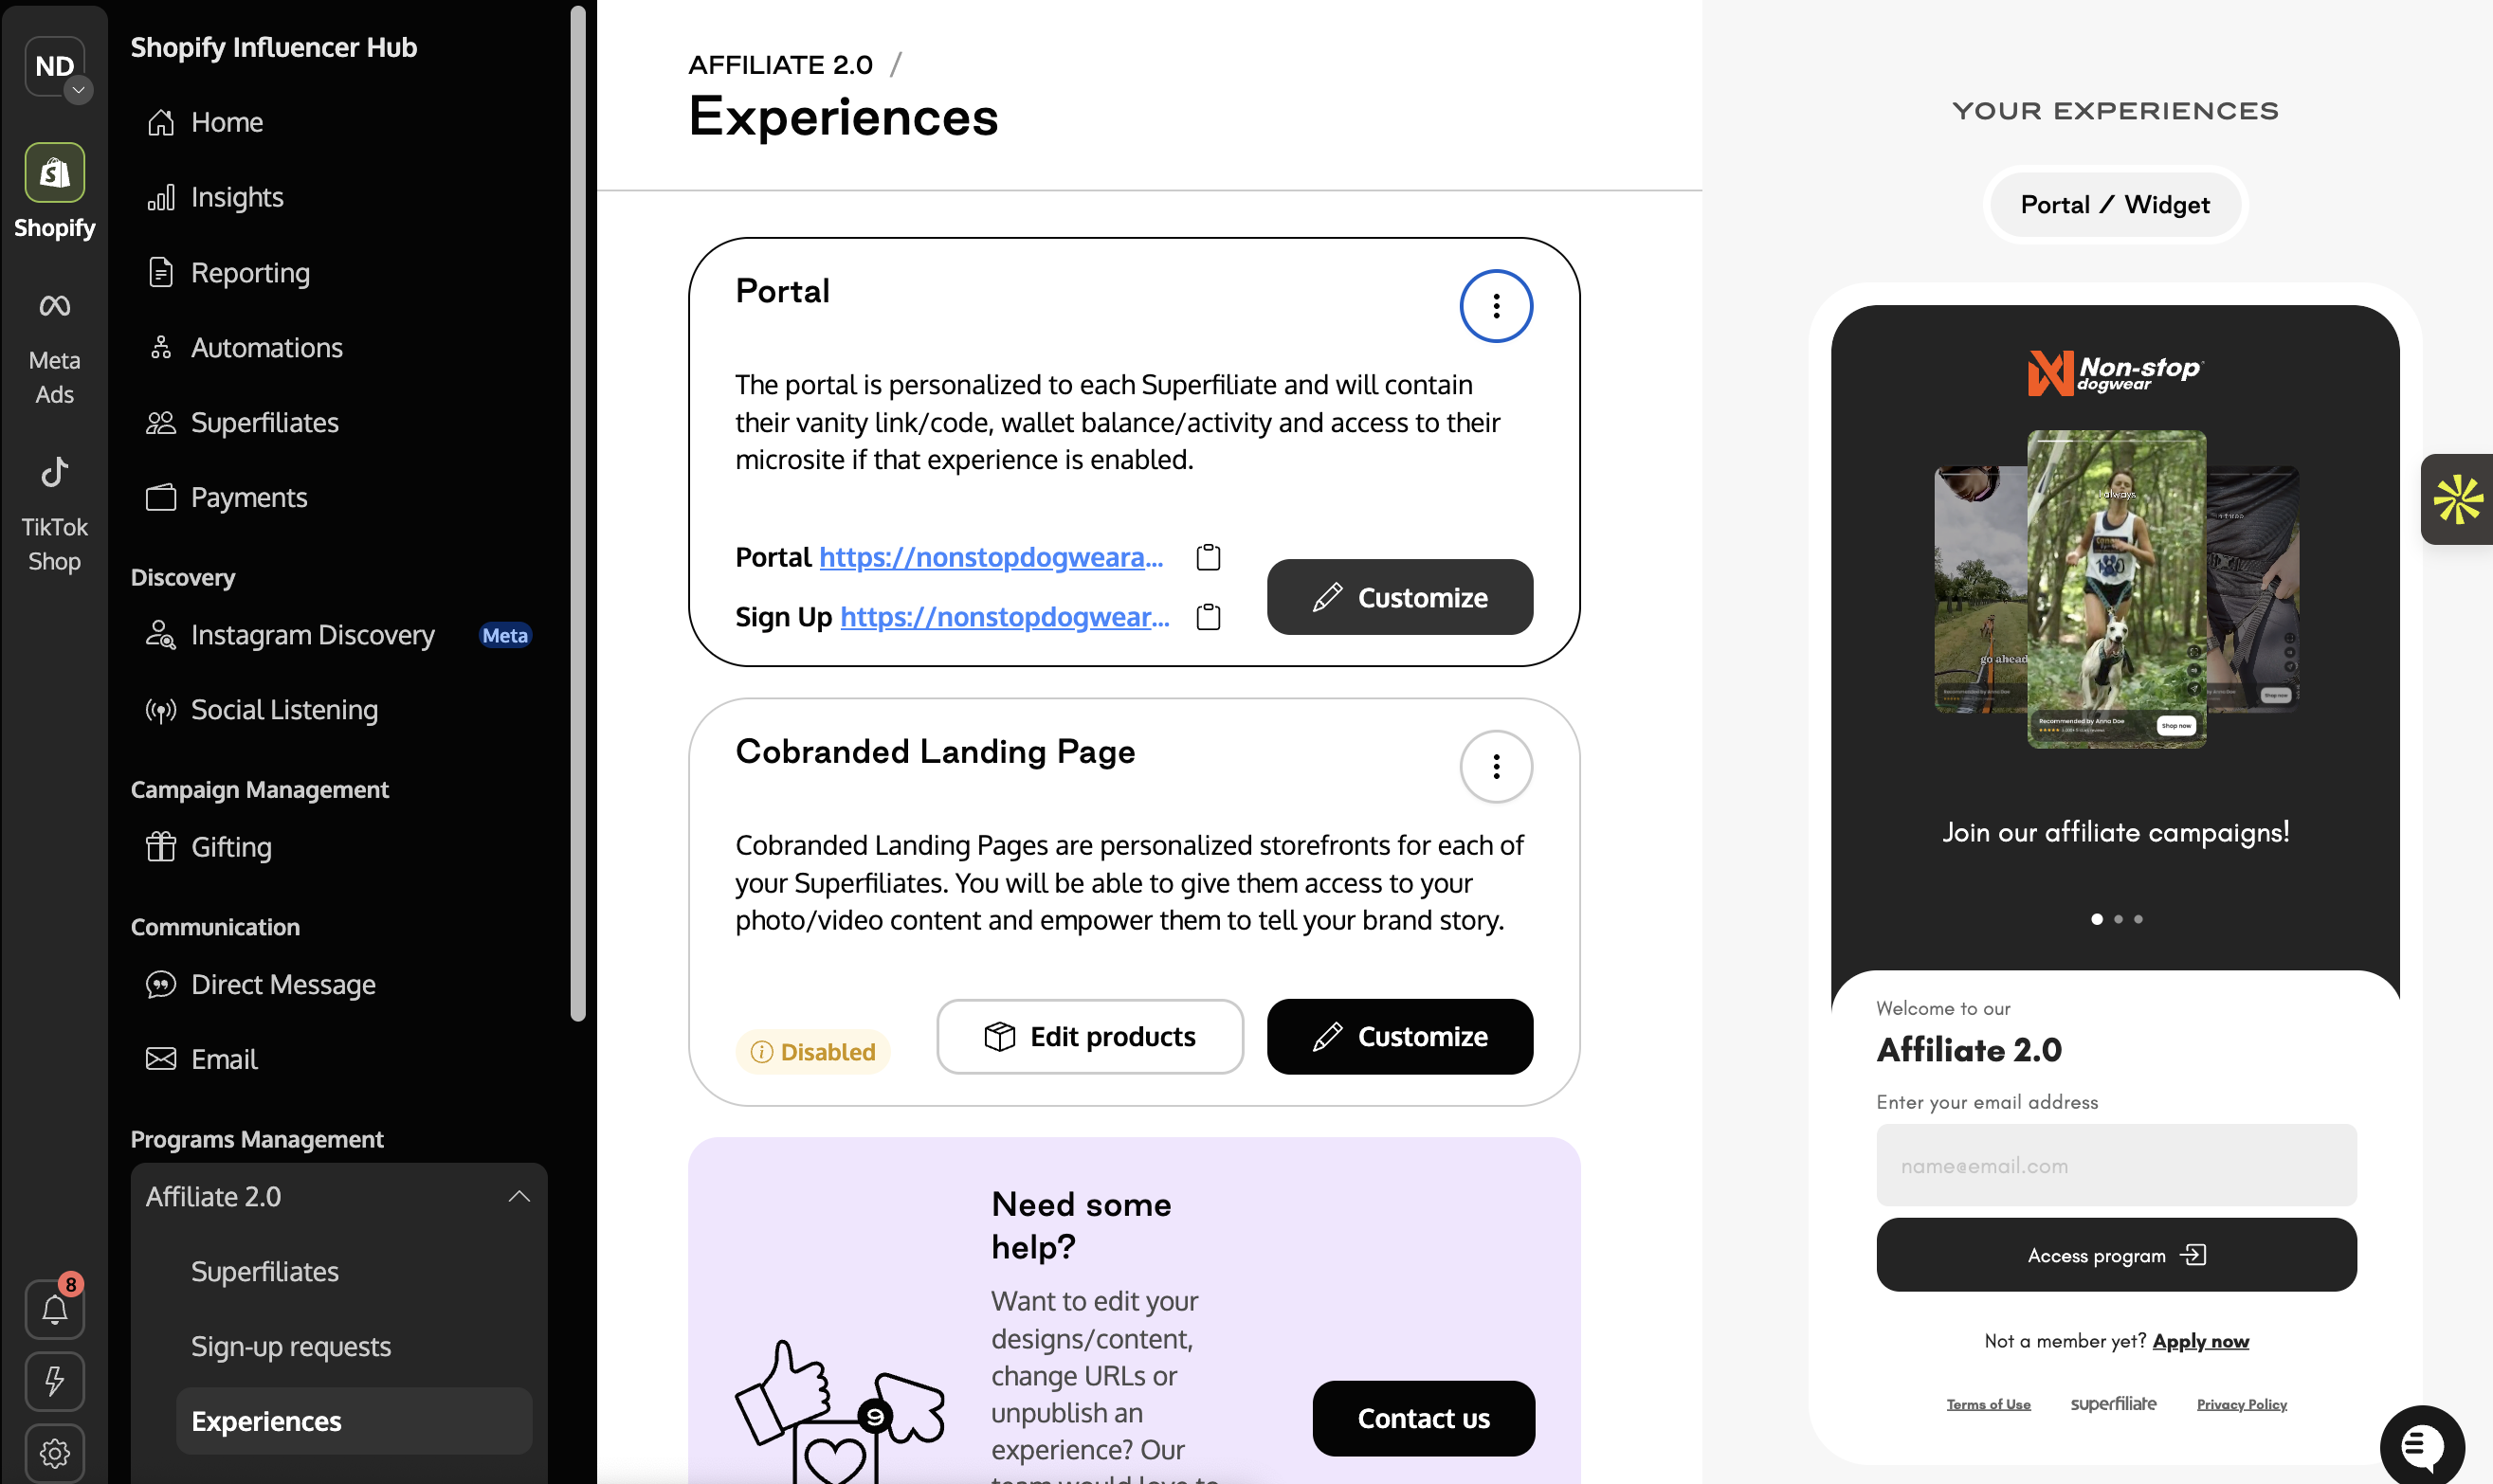
Step 1: Navigate to Portal Customization
- Go to your Superfiliate admin dashboard
- Navigate to: Program → Experiences → Customize Portal
- Click Homepage in the left sidebar
- Select Sections Content
- Choose Homepage/Referral offer
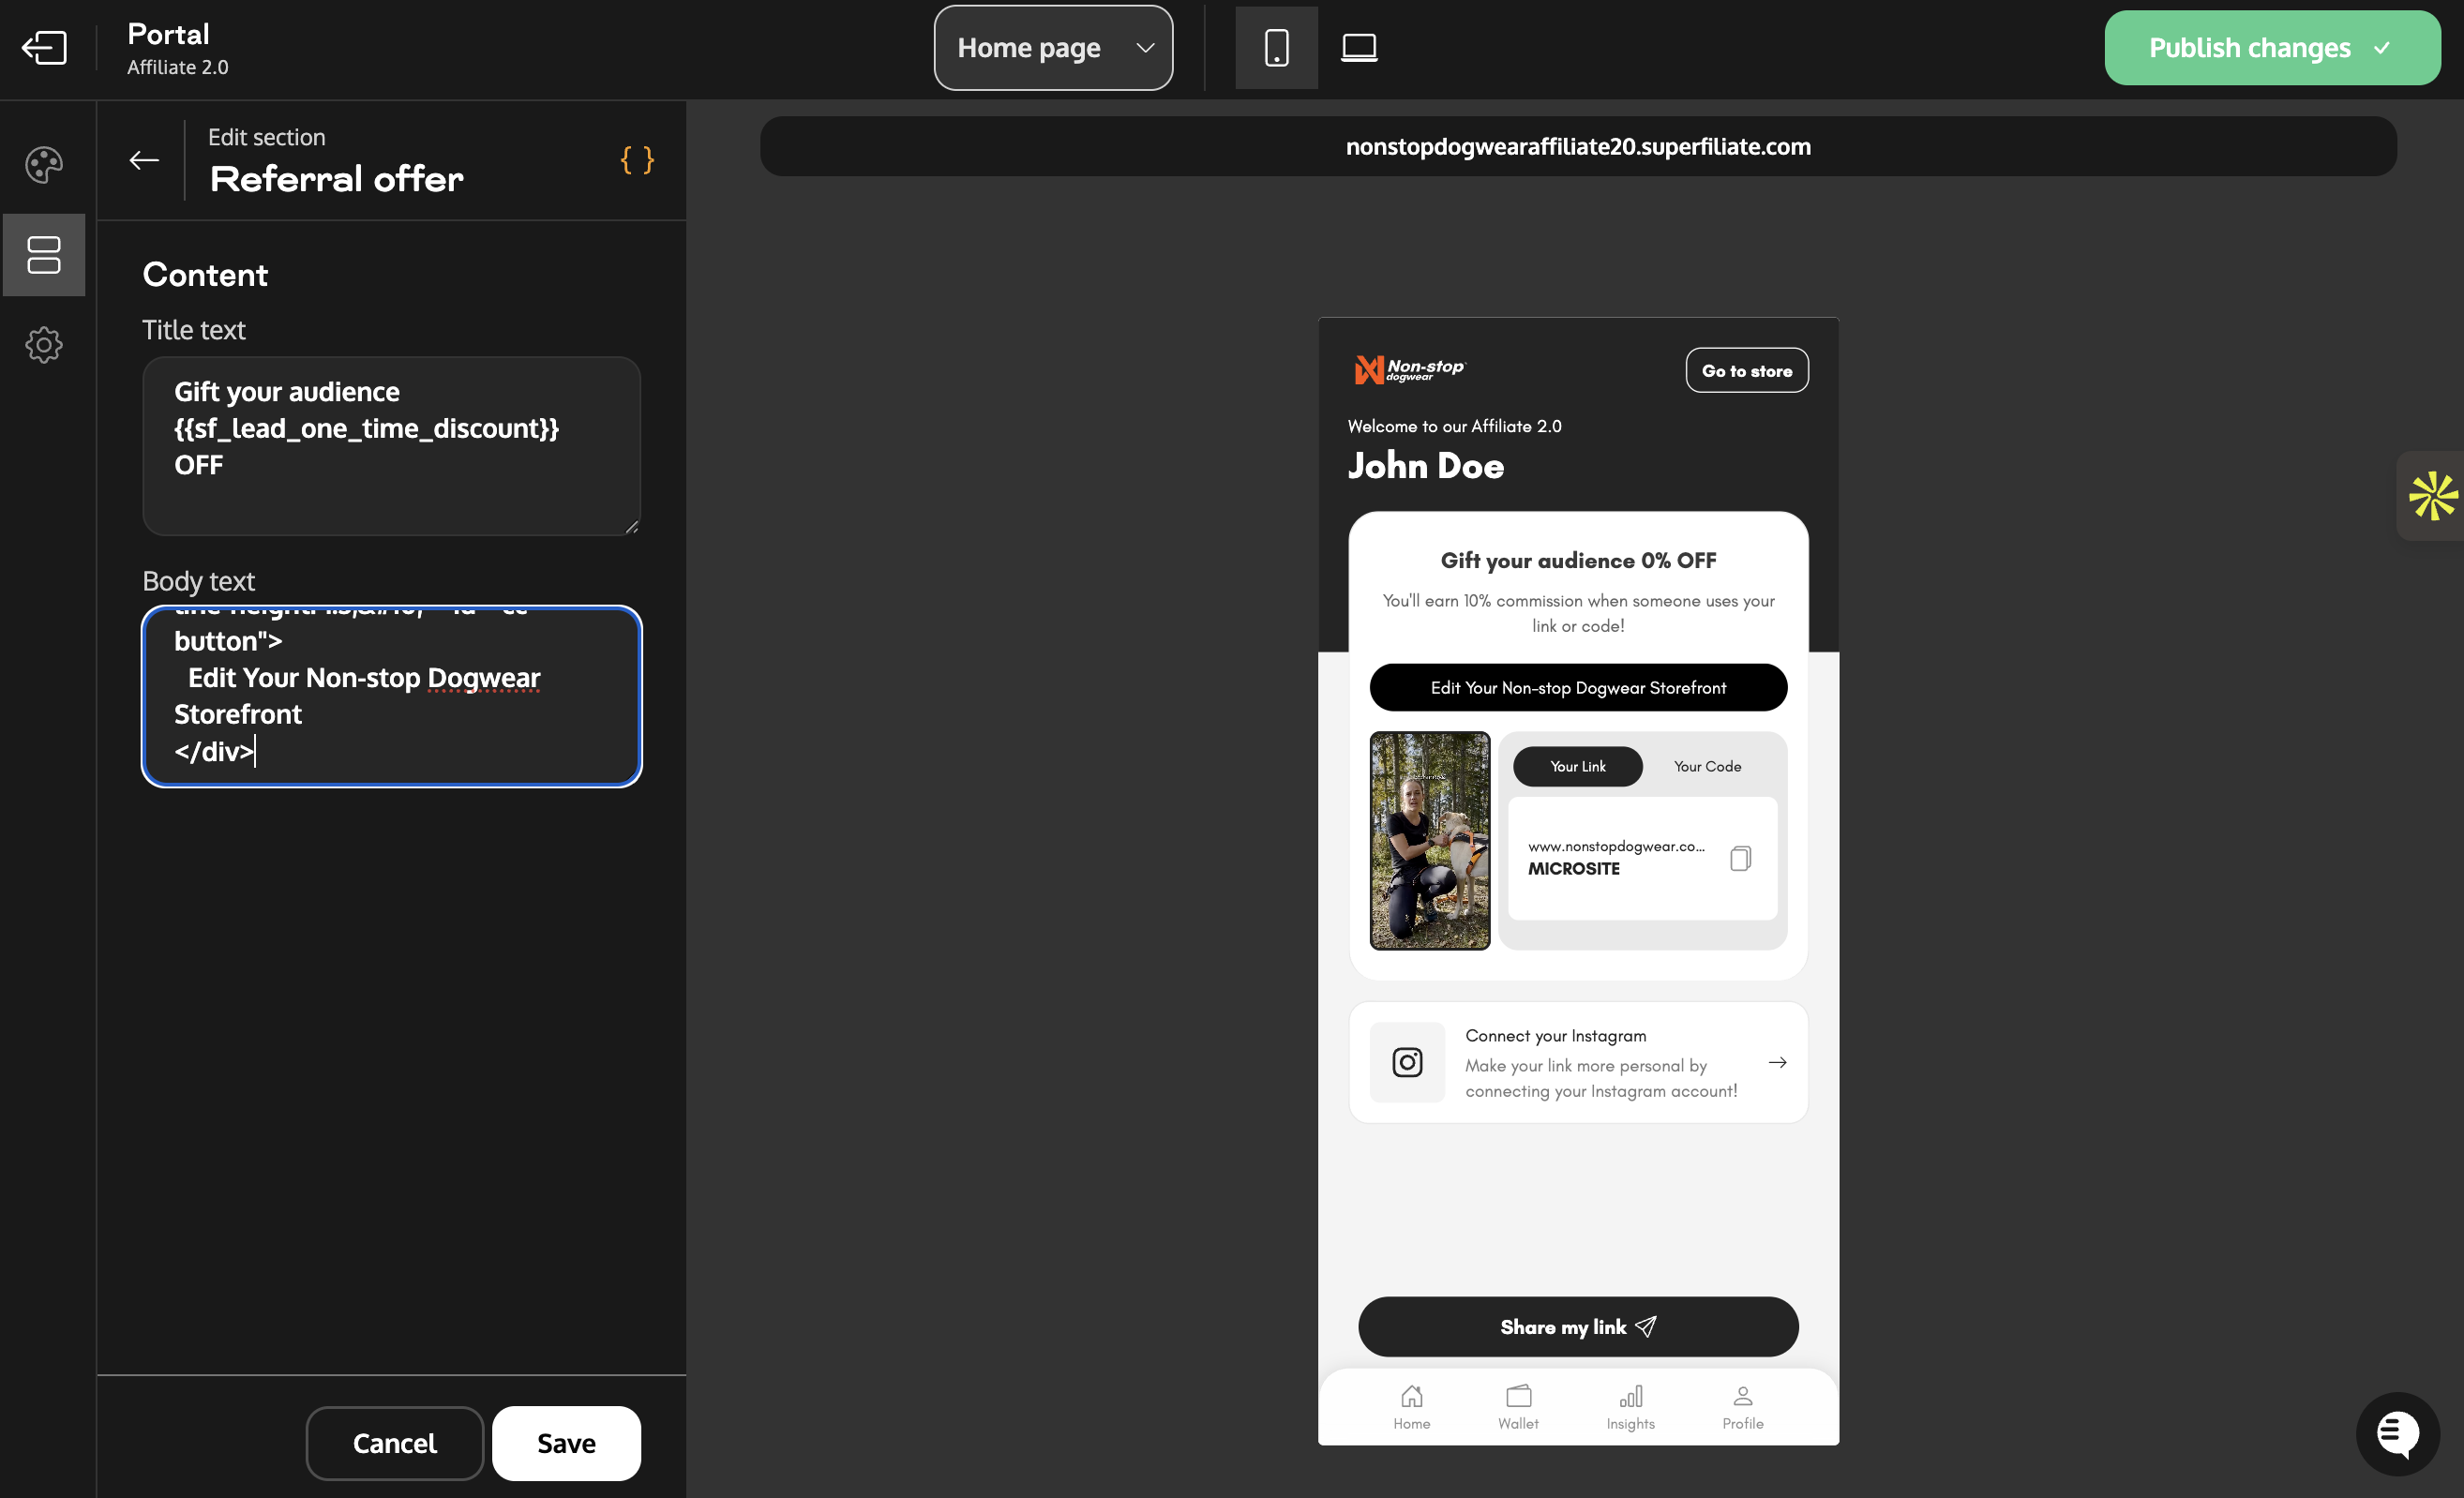
Step 2: Add the SSO Button HTML
Paste the following HTML into the content editor:
<span id="sf-email" style="display:none;">{{ sf_email }}</span>
<span id="sf-myshopify" style="display:none;">[INSERT-MYSHOPIFY-URL]</span>
<div style=" margin-top:20px; background: #000000; backdrop-filter: blur(10px); border-radius: 50px; padding: 10px 8px; font-size: 14px; font-weight: 400; color: rgba(255, 255, 255, 0.95); text-align: center; word-wrap: break-word; overflow-wrap: break-word; line-height: 1.3; " id="cc-button">
Edit Your [BRAND] Storefront
</div>
Step 3: Customize the HTML
Replace the following placeholders:
[INSERT-MYSHOPIFY-URL]→ Replace with your Shopify store URL- Example:
nonstopdogwear.myshopify.com - Use your full myshopify.com domain
- Example:
[BRAND]→ Replace with your brand name- Example:
Edit Your Healf Storefront - This text appears on the button
- Example:
Example of customized HTML:
<span id="sf-email" style="display:none;">{{ sf_email }}</span>
<span id="sf-myshopify" style="display:none;">nonstopdogwear.myshopify.com</span>
<div style=" margin-top:20px; background: #000000; backdrop-filter: blur(10px); border-radius: 50px; padding: 10px 8px; font-size: 14px; font-weight: 400; color: rgba(255, 255, 255, 0.95); text-align: center; word-wrap: break-word; overflow-wrap: break-word; line-height: 1.3; " id="cc-button">
Edit Your Non-stop Dogwear Storefront
</div>
Step 4: Save and Publish
- Click Save in the portal editor
- Preview your portal to confirm the button appears correctly
- Test the button by clicking it (it should open a new tab with the CreatorCommerce dashboard)
How It Works
Behind the Scenes
When a creator clicks the button:
- The system retrieves their email from Superfiliate (
{{ sf_email }}) - Sends an SSO request to CreatorCommerce with their email and your Shopify domain
- CreatorCommerce generates a secure, single-use sign-in token
- Opens their personalized dashboard in a new tab
- Creator is automatically authenticated without entering credentials
Security
- Each sign-in link is single-use and expires quickly
- Email-based authentication ensures only authorized creators access their dashboard
- No passwords are stored or transmitted
Customization Options
Button Styling
You can customize the button appearance by modifying the inline styles:
Background color:
background: #000000; /* Change to your brand color */Text:
color: rgba(255, 255, 255, 0.95); /* Change text color */
font-size: 14px; /* Adjust size */
Spacing:
margin-top: 20px; /* Space above button */
padding: 10px 8px; /* Internal padding */
Button Text
Customize the button label to match your brand voice:
Edit Your [Brand] StorefrontCustomize Your [Brand] ShopManage Your [Brand] PageUpdate Your Storefront
Troubleshooting
Button doesn't appear
- Verify HTML is pasted in the correct section (Homepage/Referral offer)
- Check that you've saved changes in the portal editor
- Clear your browser cache and refresh the portal
Button appears but doesn't work
- Confirm you replaced
[INSERT-MYSHOPIFY-URL]with your actual Shopify domain - Ensure domain format is correct:
yourstore.myshopify.com(no https://) - Check browser console for errors (F12 → Console tab)
SSO link doesn't authenticate
- Verify the creator's email exists in both Superfiliate and CreatorCommerce
- Contact CreatorCommerce support to verify SSO endpoint is configured for your domain
Support
Need help? Contact CreatorCommerce support at [email protected] with:
- Your Shopify store domain
- Screenshots of your portal configuration
- Any error messages from the browser console
FAQ
Q: Do I need to install any additional scripts?
A: No, the SSO functionality is automatically loaded. You only need to add the HTML snippet.
Q: Can I add this to multiple portal sections?
A: Yes, you can paste the HTML in any editable section where you want the button to appear.
Q: Will this work for all my creators?
A: Yes, as long as the creator has access to your Superfiliate portal and their email matches in CreatorCommerce.
Q: Can I style the button differently for different tiers?
A: Yes, you can add different HTML snippets to different tier sections with custom styling.
Q: Is this secure?
A: Yes, the SSO system uses secure, single-use tokens that expire quickly and are tied to the authenticated creator's email.


%201.png)
%201.png)