.webp)
⚠️ This guide can take up to 30min to complete - it's highly recommend to allow the CreatorCommerce team to do this for you. Submit this form to enable the CreatorCommerce team to complete email setup for you.
However, if you'd like to learn and do this yourself, you can complete the remainder of this guide to accomplish a lightweight implementation.
Before getting started, ensure that you've setup the integration with your affiliate/influencer marketing software(s). This will be needed to email contacts that are affiliates in those platforms.
To get affiliates/influencers/partners to launch co-branded shops with your brand, they first need to become aware of the opportunity. While there are other strategies you can leverage for issuing invitations, your primary Mailchimp flow will drive most of your adoption, and is extremely important to enable before updating your relevant programs/tiers for CreatorCommerce. The article will walk you through setting up this flow in Mailchimp. If you don't want to read it and would rather get some hands on support, you can make a request for the CreatorCommerce team to do this for you here.
Step 1: Create an email template for your CreatorCommerce invitations
In your main flow, you'll be creating 5 emails, if not more. For this reason you'll want to make your life easier by creating an email template (which should essentially be a simpler version of your existing templates).
Create the template
- Go to "Content" and then "Email templates"
- Click "Create template" or click to "Replicate" an existing template
- Name your template "CreatorCommerce Template"
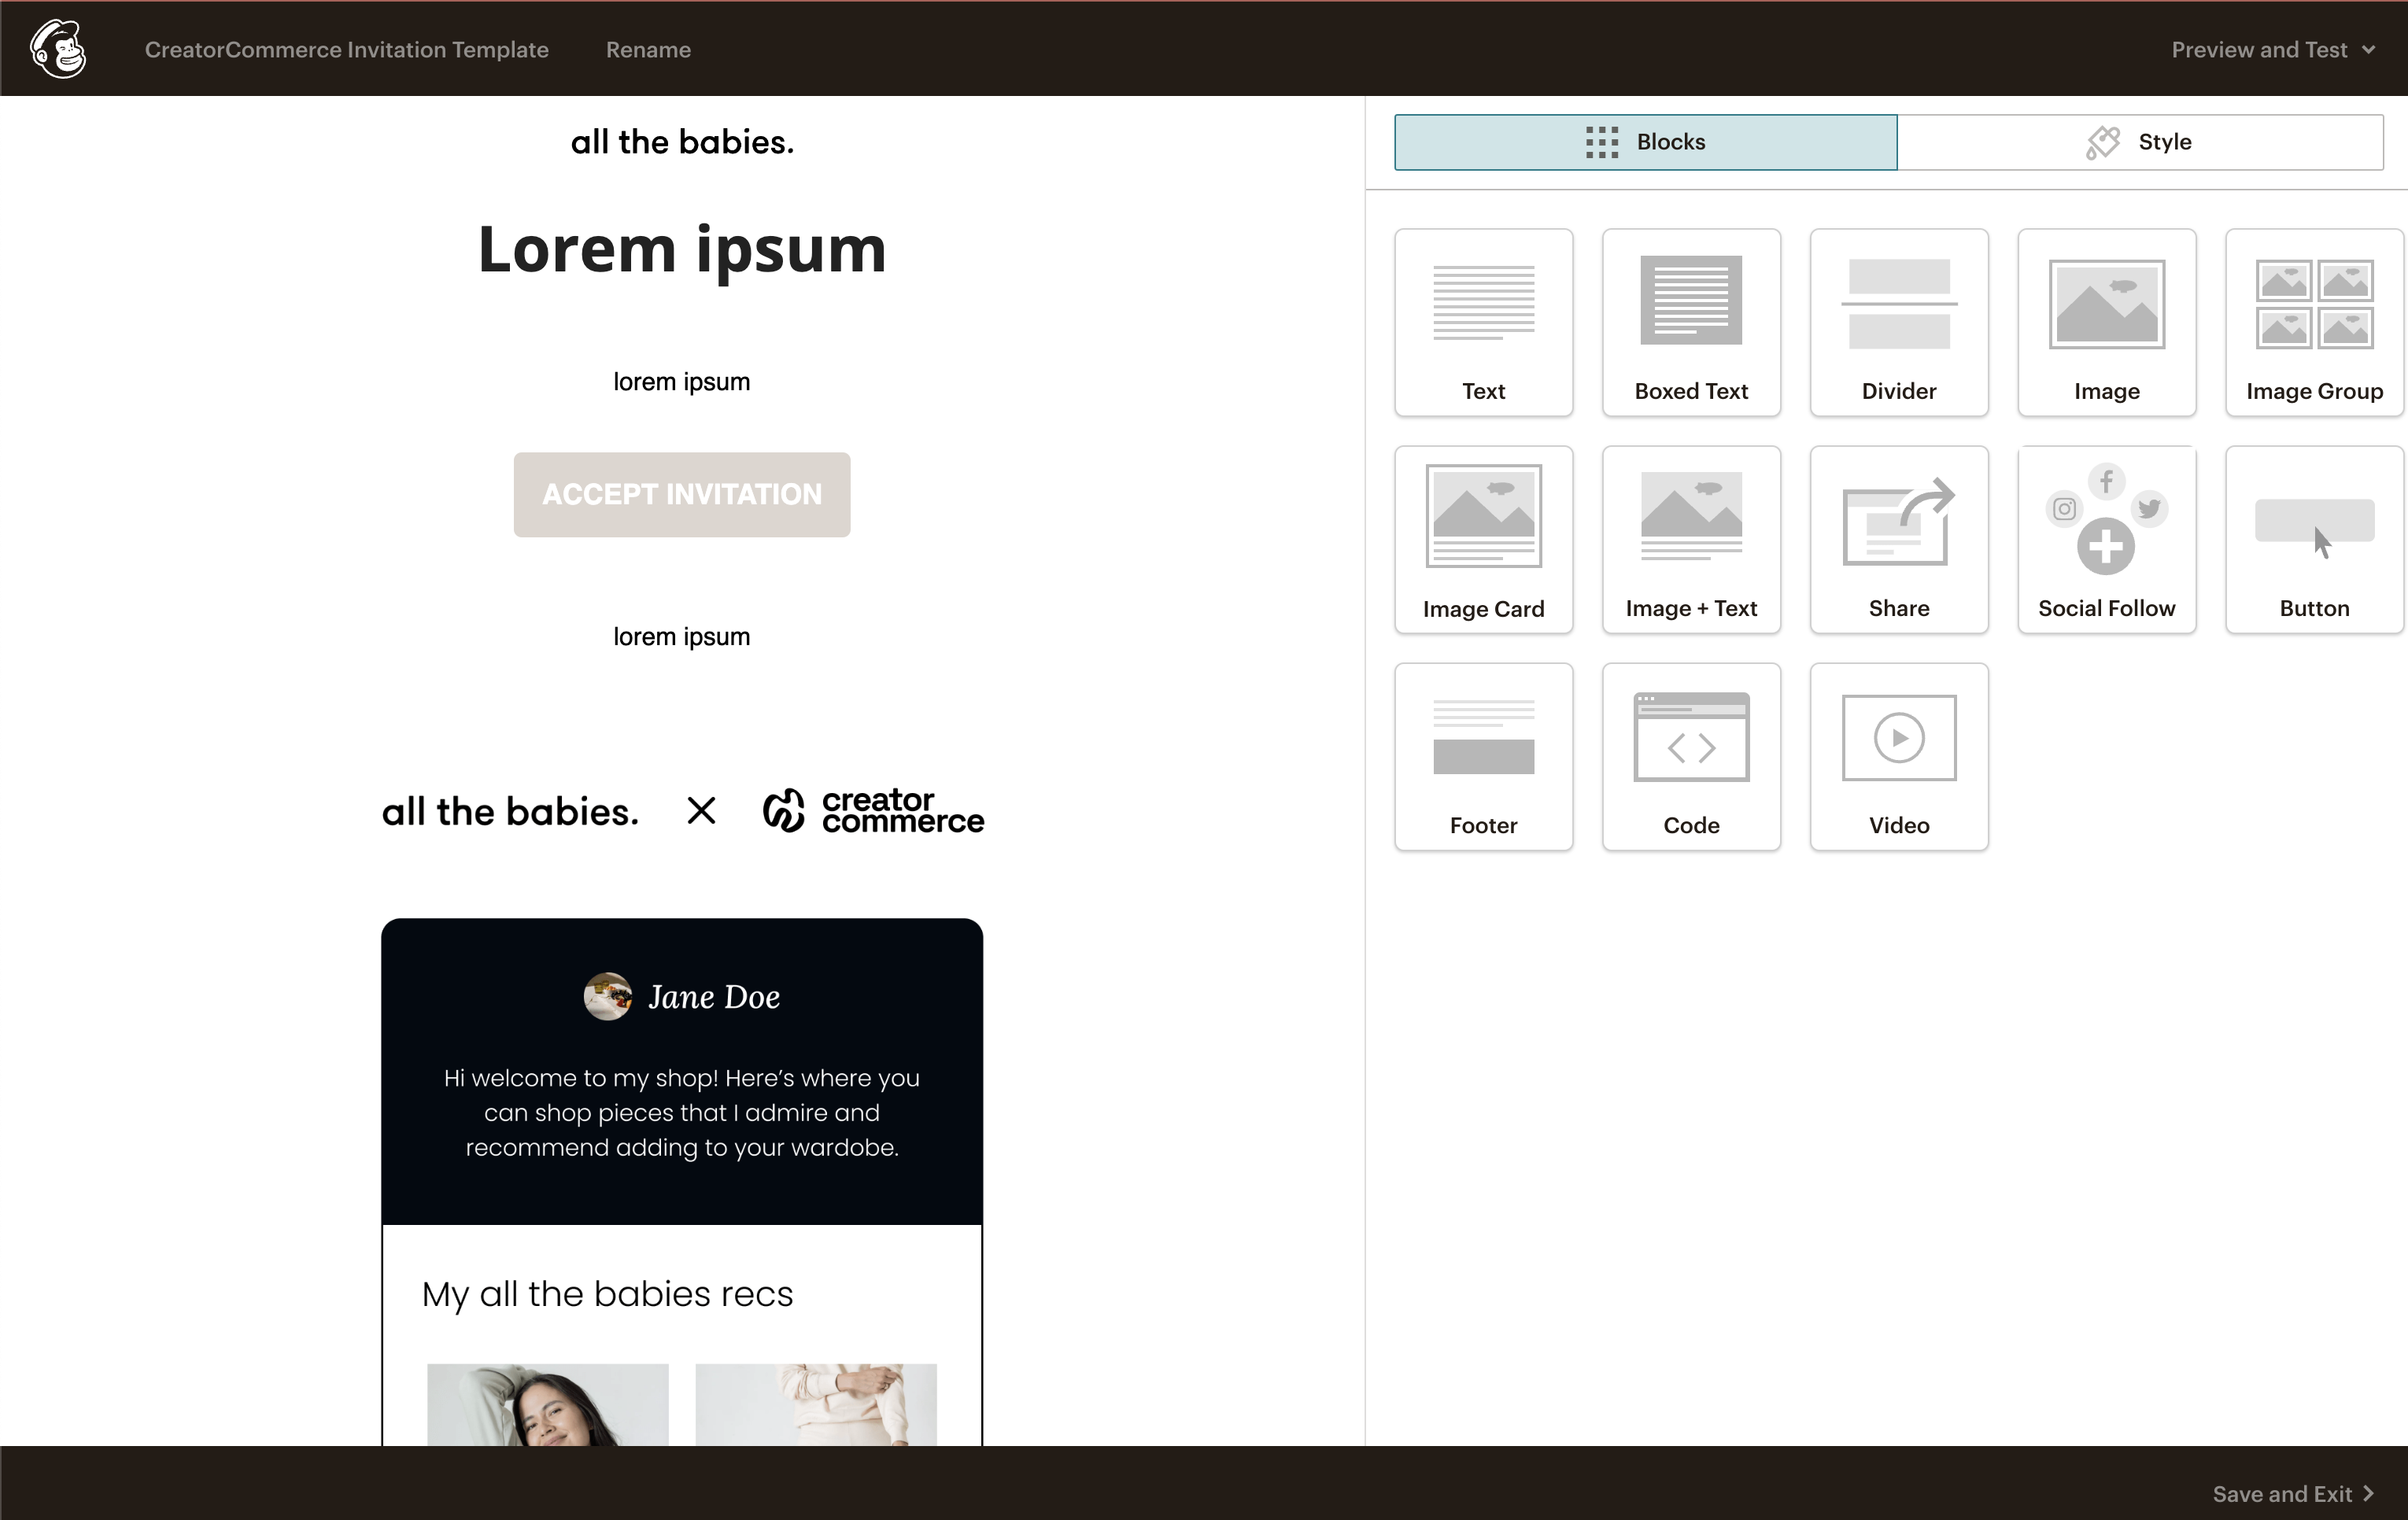
Template sections
- Brand Logo/Header - Set to your brand logo
- H1 Title - Set to "Lorem ipsum"
- Body Copy Section 1 - Set to "Lorem Ipsum"
- CTA/Button - Set copy to "Accept Invitation", and set link "https://dashboard.creatorcommerce.shop/invitation?email=*|EMAIL|*&channel=<<INSERT-MYSHOPIFY-DOMAIN-HERE>>"
- Body Copy Section 2 - Set to "Lorem ipsum"
- (Optional) Promotional/teaser image that shows off what a shop looks like - Contact us to get one for your brand
Pro tip: Don't forget to replace <<INSERT-MYSHOPIFY-DOMAIN-HERE>> with your actual myshopify domain such as: https://dashboard.creatorcommerce.shop/invitation?email=*|EMAIL|*&channel=allthebabies.myshopify.com
Step 2: Create the CreatorCommerce invitation journey
With your affiliate software integrated and email template created, it's time to assemble the flow.
Setup the foundation
- Go to "Automations" and then "All Journeys"
- Click "Build from scratch"
- Name your journey "CreatorCommerce Co-branded Shop Education Flow"
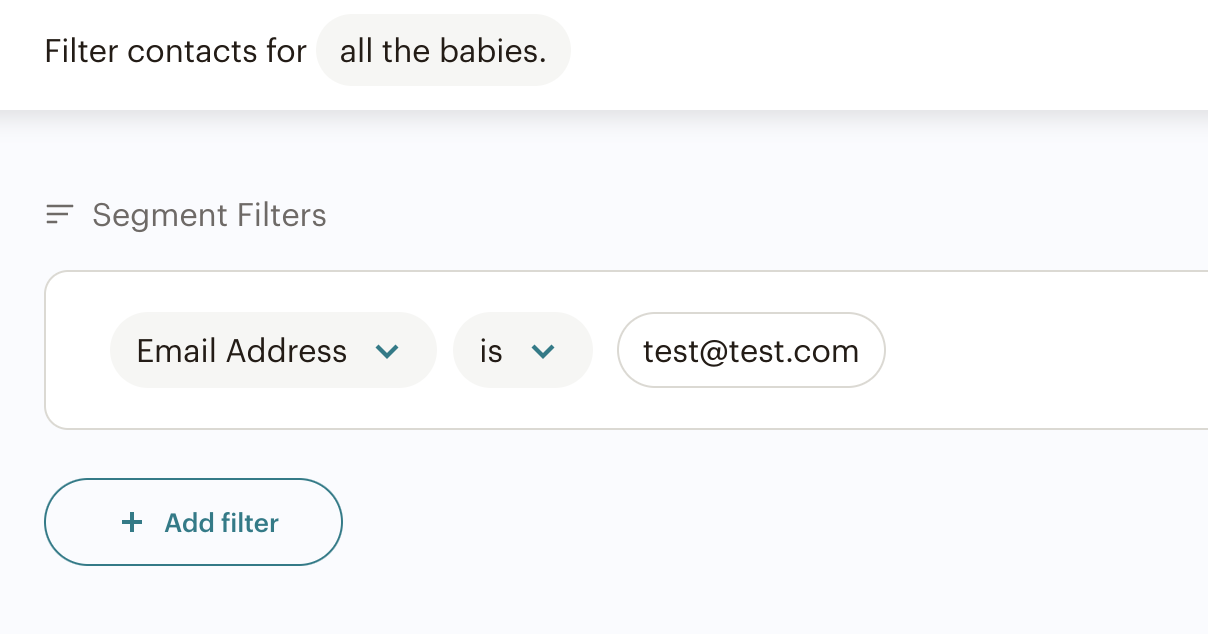
- When choosing a starting point, select criteria that identifies contacts that are contained in your integrated affiliate marketing platform (You can choose any criteria that is added explicitly if the contact is an affiliate for your brand, such as a tag for example)
- Additionally add a temporary filter to restrict the recipients to your email address only. This will ensure you can do a complete test run before opening up the gates to other affiliates.
Building email #1
- Click to add a journey point, and select "Send email"
- Select the email block to start building the email
- Select "CreatorCommerce Template" when choosing a template
- Implement messaging from one of the following two email copy outlines:
Email #1 (Option A - Recommended) messaging for performance-based (tiered) commission structures
Subject: <YOUR-BRAND-NAME>> Collaboration: Double Commissions!
H1 Title: Hey {{ first_name|default:"" }}, Let's Take Your Collab to the Next Level
Body Copy Section 1: We care about setting our affiliates up for success, so they can make referrals with ease & grow their income in the process.
That's why as a <<BRAND-NAME>> affiliate, you get access to a co-branded affiliate shop of your own. Allowing you to bring more trust & novelty to the affiliate process -- delivering more sales compared to traditional affiliate links & codes.
With each and every sale made on your shop, you'll receive rewards based on the following scale:
- Start with a <<STARTER-RATE>> commission rate, whenever someone makes a purchase, you’ll receive cold hard cash
- When you reach <<THRESHOLD-ONE>> in sales on your shop, you’ll get bumped up to a <<VIP-RATE>> commission rate 💰
- When you reach <<THRESHOLD-TWO>> in sales on your shop, you’ll receive a $<<BONUS-AMOUNT>> cash bonus ⭐️
CTA/Button: Accept Your Invitation (Link: "https://dashboard.creatorcommerce.shop/invitation?email={{ email }}&channel=<<INSERT-MYSHOPIFY-DOMAIN-HERE>>")
Body Copy Section 2: We’ve partnered with CreatorCommerce to make this possible, and for you to launch a co-branded shop in as little as a few minutes. Just accept your invite to begin.
Kind of a no-brainer right?
Email #1 (Option B) messaging for if there's uniform commission rates being used
Subject: <<BRAND-NAME>> Collaboration: Boost Your Sales
H1 Title: Hey {{ first_name|default:"" }}, Let's Take Your Collab to the Next Level
Body Copy Section 1: Thank you for choosing to collaborate. We're excited to announce a new collaboration format that's leading to more sales, and higher payouts compared to typical affiliate links — introducing co-branded affiliate shops.
How do they work? Co-branded shops allow you to showcase a shopping experience that’s branded by you, and your favorite <<BRAND-NAME>> products. Allowing you to better engage your audience, and turn that interest in income. For every sale on your shop, you'll get a <<COMMISSION-RATE>>% back, paid in <<UNIT-OF-PAYMENT>>.
We’ve partnered with CreatorCommerce to make this possible, and for you to launch a co-branded shop in as little as a couple minutes. Just accept your invite to begin.
CTA/Button: Accept Your Invitation (Link: "https://dashboard.creatorcommerce.shop/invitation?email={{ email }}&channel=<<INSERT-MYSHOPIFY-DOMAIN-HERE>>")
Body Copy Section 2: Move away from one-off discount codes & affiliate links, and offer a novel referral experience centered around product curation. On average, affiliates more than triple their commission-revenue when compared to any affiliate link they’ve tried in the past.
Building email #2
- Click to add a journey point, and select "If/Else"
- Select "Email interaction" in the Segment Filters and select "Clicked" followed by "Email contacts from your customer journey"
- Then click "Use segment"
- For "Yes" do nothing
- For "No", click to add a journey point, and select "Time delay", and set it to 2 days and click "Save"
- Click to add a journey point, and select "Send email"
- Select the email block to start building the email
- Select "CreatorCommerce Template" when choosing a template
Email #2 messaging
Subject: <<BRAND-NAME>> Collaboration: Accept Your Shop
H1 Title: Don't Forget to Accept Your Shop, {{ first_name|default:"" }}
Body Copy Section 1:
We noticed that you haven’t accepted your <<BRAND-NAME>> co-branded shop yet. As a quick reminder, we’ve partnered with CreatorCommerce to help boost your referrals and affiliate income.
How? Co-branded affiliate shops bring novelty & trust to the affiliate experience - leaving you with more consumer engagement, and commissions in your pocket.
CTA/Button: Accept Your Invitation (Link: "https://dashboard.creatorcommerce.shop/invitation?email={{ email }}&channel=<<INSERT-MYSHOPIFY-DOMAIN-HERE>>")
Body Copy Section 2: Here are some benefits to working with CreatorCommerce you might appreciate:
1. Create trust & novelty by showcasing your product recommendations
2. Offer lightning fast checkouts with auto-applied discounts and on-site purchasing
3. Build a community and repeat customers by establishing a personal brand & email list around product curation
Building email #3
- Click to add a journey point, and select "If/Else"
- Select "Email interaction" in the Segment Filters and select "Clicked" followed by "Email contacts from your customer journey"
- Click "Add filter" and repeat the filter to ensure that all of the appearances of "Email contacts from your customer journey" are accounted for
- Select "Use segment" when done
- For "Yes" do nothing
- For "No", click to add a journey point, and select "Time delay", and set it to 4 days and click "Save"
- Click to add a journey point, and select "Send email"
- Select the email block to start building the email
- Select "CreatorCommerce Template" when choosing a template
Email #3 messaging
Subject: <<BRAND-NAME>> Collaboration: Don't Lose Your Affiliate Shop Access
H1 Title: {{ first_name|default:"" }}! Don't Lose Your Shop Access
Body Copy Section 1: We wanted to send you one last reminder about our invitation to create a co-branded <<BRAND-NAME>> shop with CreatorCommerce.
It allows you to build a side-hustle around selling our products, where you'll get up to a <<TOP-COMMISSION-RATE>> commission per sale (paid in cash 💰).
CTA/Button: Accept Your Invitation (Link: "https://dashboard.creatorcommerce.shop/invitation?email={{ email }}&channel=<<INSERT-MYSHOPIFY-DOMAIN-HERE>>")
Body Copy Section 2: Interested? Co-branded shops are a great tool for conducting engaging collabs that generate meaningful income.
Building email #4
- Click to add a journey point, and select "If/Else"
- Select "Email interaction" in the Segment Filters and select "Clicked" followed by "Email contacts from your customer journey"
- Click "Add filter" and repeat the filter to ensure that all of the appearances of "Email contacts from your customer journey" are accounted for
- Select "Use segment" when done
- For "Yes" do nothing
- For "No", click to add a journey point, and select "Time delay", and set it to 10 days and click "Save"
- Click to add a journey point, and select "Send email"
- Select the email block to start building the email
- Select "CreatorCommerce Template" when choosing a template
Email #4 messaging
Subject: <<BRAND-NAME>> affiliates are printing money with co-branded affiliate shops
H1 Title: A Reflection on Co-branded Shop Success
Body Copy Section 1: A few weeks ago we extended exclusive offers to our affiliates to allow them to sell products from a curated & co-branded shop of their own.
The results so far have been outstanding. Those who’ve launched a shop are seeing <<SPECIFIC-CVR-METRIC>>X more affiliate sales as compared to traditional affiliate links, and are earning up to $300, and even $3,000 a month.
Given the results, we wanted to extend an additional invitation for you to create a co-branded shop with CreatorCommerce, so that you can sell <<BRAND-NAME>> products on it.
CTA/Button: Accept Your Invitation (Link: "https://dashboard.creatorcommerce.shop/invitation?email={{ email }}&channel=<<INSERT-MYSHOPIFY-DOMAIN-HERE>>")
Body Copy Section 2: We believe in elevating our affiliates, so that they can stand out from the crowd and build a bigger, better, and more authentic affiliate income stream.
Building email #5
- (Skip the conditional statement this time) Click to add a journey point, and select "Time delay", and set it to 30 days and click "Save"
- Click to add a journey point, and select "Send email"
- Select the email block to start building the email
- Select "CreatorCommerce Template" when choosing a template
Email #5 messaging
Subject: How to Use Your Own Shop To Boost Audience Engagement
H1 Title: The Truth About Audience Engagement and Affiliate Links
Body Copy Section 1:
The problem with brands today is that they push affiliate links too hard, and force their affiliates to become human billboards.
At <<BRAND-NAME>>, we know that affiliates should be treated like partners.
This is why we encourage our partners to sell our products from a co-branded shop of their own. We’ve seen time and time again that this allows them to build their own business recommending products on behalf of their favorite brands.
What's the outcome been? Major increases in shopper engagement. Followers care about recommendations and curation, not advertisements & affiliate links. So if you haven't launched a co-branded shop yet, you can do so with the link below.
CTA/Button: Accept Your Invitation (Link: "https://dashboard.creatorcommerce.shop/invitation?email={{ email }}&channel=<<INSERT-MYSHOPIFY-DOMAIN-HERE>>")
Body Copy Section 2: When you accept, you can add and sell <<BRAND-NAME>> products directly from your store, and earn far more commissions than ever before!
Enable the journey
Select "Turn On" and set everything to "Live". Given the flow is set to a scoped segment, this is a safe action to take. Now you can begin testing.

Step 4: Expand your segment
Now that your journey is enabled, and filtered to just your testing email, you can now expand the scope of that segment to include more profiles as needed. To start we recommend testing with yourself.
Note: Before proceeding, you should have already enabled the CreatorCommerce integration for your affiliate/influencer marketing platform of choice, and that platform should also already be connected to Mailchimp. Checkout our guides on how to do this with Shopify Collabs or Social Snowball. To test that you're ready to move forward, update your program/tier for your own affiliate account, and then go to your Mailchimp profile to check that this updated there as well. You should see the relevant tag for the platform. If that's apparent, you are good to proceed.
Test for yourself
- Return to your journey
- Select the filter on the starting point
- Ensure it's filtered to an email that you have access to
- Add that email to a tier/program in your affiliate software
- Wait for this to update, and observe yourself entering the journey and receiving the first email (Sometimes Mailchimp can takes update to 20 minutes to do this)
- Click the "Accept Invitation" link in the email, and confirm it takes you into the CreatorCommerce onboarding flow (Success!)
Go live 🚀
- Return to your journey
- Select the filter on the starting point
- Remove the filter for just yourself, but ensure it's the starting point is still based on your collective CreatorCommerce affiliates
- Select to "Turn Back On"
- Now sit back, relax, and open up some popcorn because you are now live (Congrats!)
Still stuck and trying to get live? No worries, let's get you situated. Book a support call with us here.


%201.png)
%201.png)